| |
DETAILS |
|
|
These are fun to do and so simple. Donít be put off by the length of the instructions, itís all pretty straight forward. Decide on the size youíre going to make your card, determined by the envelope youíre planning to use. See our
envelope template if you need to make one. Remember you want the size doubled for an inside and an outside. Our card was approximately 5 and 1/2 inches by 5 and 1/4 inches which fits the envelopes we have on hand. Once you have decided on size, make a heart template of lesser size than your card. If you need help with this go to
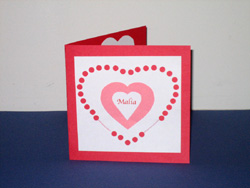
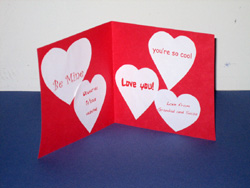
heart chain for instructions. Place the template on the front of your card and lightly trace around it with a pencil. Punch holes along this line. Your punch might not be deep enough to reach all of the line. If this bothers you, add a red pencil line where you canít punch to connect the dots. Now youíre on your own, do what your creativity suggests for the center. To get the name Malia centered in the heart, we typed it into the computer, printed it, cut out a heart the size we wanted, placing it UNDER the sheet of so writing so we could see to center it. Once Satisfied, we traced around the heart, cut it out and pasted it. This could be done as one step on the computer, there are hearts to be found there, but, oh dear, I couldnít find them. Maybe you can. INSIDE: My grandchildren Email in a variety of colors and fonts so they got a kick out of filling the inside with a variety of messages in a variety of fonts and colors. We cut out different sized hearts, typed the messages on the computer, printed them and used the heart under writing technique to center them, then drew around the template heart, cut it out and pasted. Younger children could simply write in their messages with crayons or colored pencils or make XXOO to express their love.Happy valentines day!
|
|


